
diy princess leia organa dress and belt - star wars
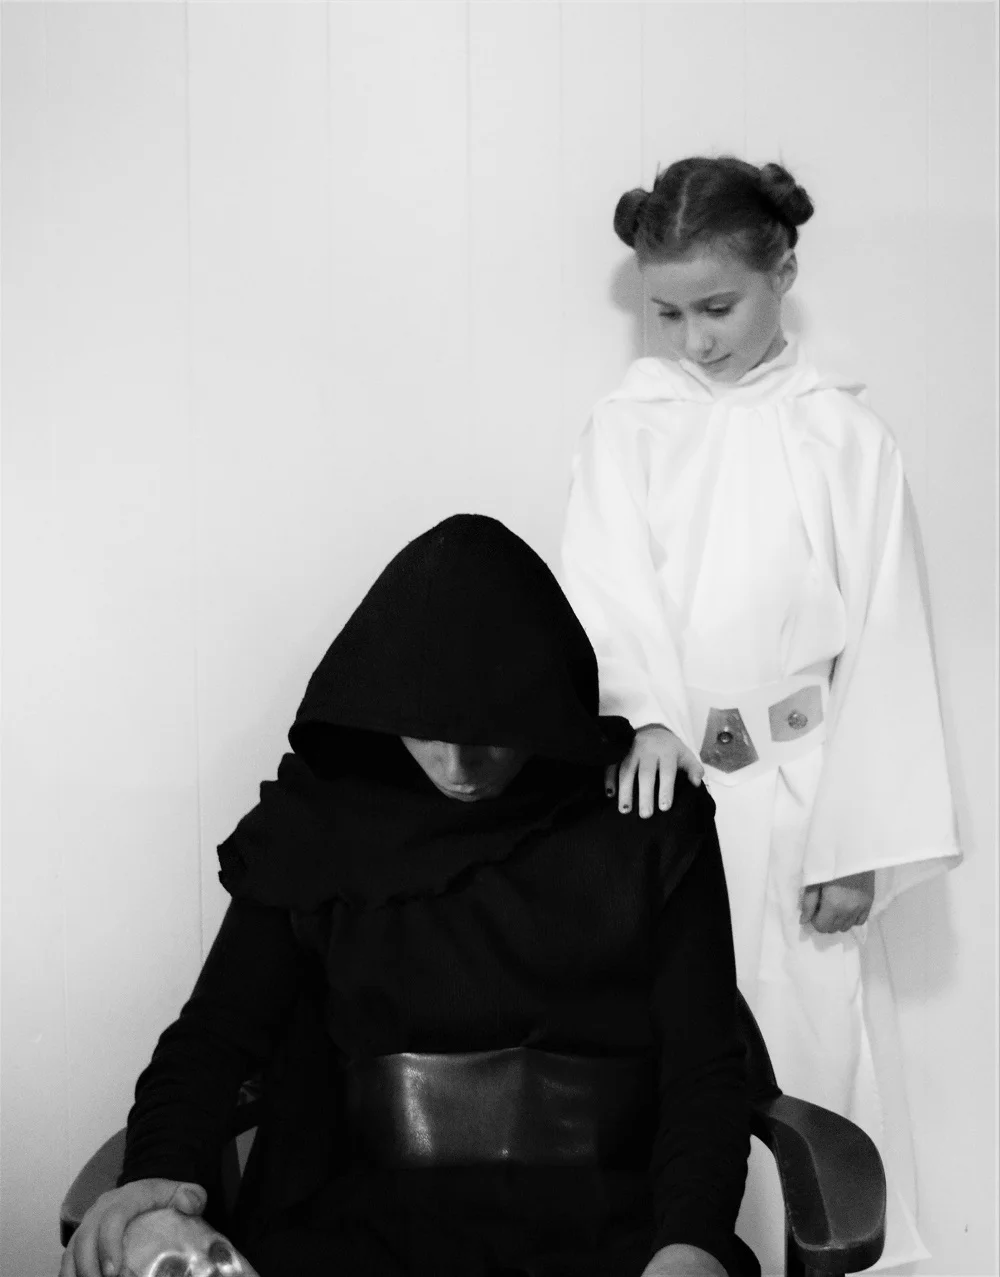
Don't be a scruffy looking nerf herder! You can make a Princess Leia dress and look fabulous at your next costume event. This dress is sized for a child... I think it should work fine as a costume for girls between the sizes of 7/8 and 9/10.

The dress itself isn't too difficult once you get your pattern down. I purchased a flat sheet from the thrift store to create my pattern.
You'll need the following supplies.
- 3 yards white peachskin fabric.
- small hook and eye closures
- fusible interfacing (collar)
- scissors or rotary cutter and mat
- white thread/pins/sewing needle/measuring tape
- sewing machine
Dress Measurements:
- Top across arm: 25.5 inches
- Sleeve width: 12.5 inches
- Neck hole: 3 inches curved
- Shoulder: 11.5
- Underarm is marked 9 inches beneath shoulder area
- Length: 40.75 inches
- Bottom width 18.75 inches.
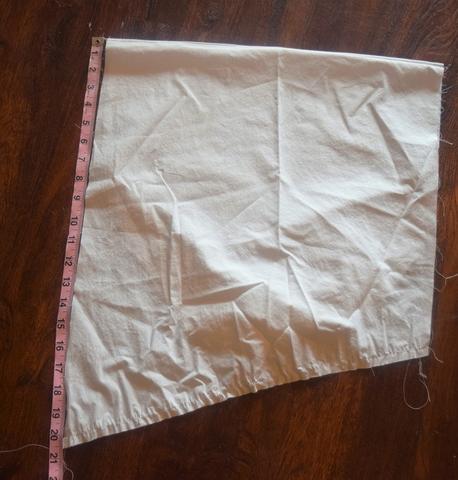
Directions to make the pattern:
- Fold your sheet. Fold it first in half and then fold again length-wise.The top folded short edge will be the sleeves and neck. I used a sharpie to mark cutting lines right on the sheet.
- Mark 3 inches over and 3 inches down on the top folded corner. This is the neck hole. It should be small don't worry.
- Measure and mark sleeve length and width.
- Measure and mark dress length and width. If the sheet is too short just write on it the amount to add when cutting actual fabric.
- Connect the marks to form a dress shape. Princess Leia has a nice sharp arm drape and I also added that to the dress hem. If you want the dress to hang straight, do not add the point at the bottom. Just straighten it out. I thought it gave it a bit of a sharp "imperial" feel which I liked, but you may not.

Cut out your dress pattern along the drawn edge. Cut a slit about 3-4 inches down in the back neck edge so you can fit your head through. Try it on and make or take note of any necessary adjustments. Mark your knee length where you will leave side slits open.
Hood Pattern:
The hood piece is cut on a fold with the cut side mimicking a parallelogram. Cut two.
- The long side measures 20.5 inches from fold.
- The short side is 15 inches.
- You need 17 inches for the width.
Collar Pattern:

The collar is the hardest part of the whole darn costume! You may be able to find a better collar diy out there. This is all I had the brain power to conjure up. Cut a piece of fusible interfacing if you want it stiffened up but my daughter said it felt better softer so we didn't use it. Collar is cut on a fold and measures:
- long side 17 inches
- short side 15 inches
- height 3 inches
Directions to make the dress:
- Fold your fabric the same way you folded the sheet and then pin your sheet pattern on top of the fabric.
- cut out your dress pattern and cut key hole slit in the back at the center neck.
- cut out a second dress.This will be your lining. You can fully line or cut it short at the knee.
- cut out your hood and collar pieces.
DRESS:

- Stitch dress right sides together. Using a 1/2 inch seam allowance (for all parts of the dress) start at the end of the sleeve and follow under the arm and down to the knee where you want the slit to start. Make sure you back stitch at the beginning and end of your seams to reinforce.
- Repeat on the other side.
- Hem your sleeves.
- Hem your side slits.
- Hem the dress bottom.
- REPEAT all steps for the lining.
- With right sides together pin the lining to the dress around the neck hole and key hole slit you cut. Sew together. Turn right side out so lining is inside of dress. Push sleeves of the lining into dress sleeves and tack the lining to the dress at shoulder and underarm seams if you wish.
HOOD:

- With right sides together sew the hood together on both long sides. Turn right side out and press. Using a long machine stitch, gather the short ends of the hood.
- If you can pin the hood to the dress while the recipient is wearing the dress that is helpful but not necessary. The gathered sides of the hood get sewn onto the dress's neck edge. The longer edges go toward the face roughly in the shoulder area with the shorter edges at the key hole opening. The hood has beautiful drape in the back when down and is like a parachute of sorts when on the head. Pull gathers to adjust fit as needed.
- Pin the hood as described. The rough, gathered edge is pinned to the finished edge of the neck. I know it feels weird but just go with it. Pretend the neck edge is also a raw edge and that will help... It would be like matching up raw edges! I wish I had taken a photo of this! Once you have it pinned, stitch the hood to the neck at raw edge.
COLLAR:
- Iron on the fusible interfacing to one side of the collar on the wrong side of the fabric if you are using interfacing.
- With right sides together sew the short sides of the collar together leaving about 1/2 an inch un-sewn at the long raw edge. Turn right side out.
- With right sides together pin one long raw edge of the collar to the neck of the dress. The hood will be sandwiched between the collar and the dress. I pinched the front of the dress to fit the collar and give extra flounce. You may be able to leave the dress smooth. Just make sure the end of the collar matches up with the edge of the dress at the back keyhole. Sew to dress. Make sure you don't accidentally catch the other side of the collar!
- Turn collar over. Press up the inner edge of the collar 1/2 an inch and hand stitch to the dress. This will conceal all the raw edges. The collar should perfectly line up with the back key hole.
- Sew on the hook and eye closures to the collar at the back. Use one at the top of the collar and one at the bottom.

THE BELT: The belt really makes the dress come to life!
Supplies:
- White vinyl.
- 3 inch white elastic.
- Silver metallic fabric.
- Fabric glue and high temp hot glue and a glue gun.
- 5 silver flat backed buttons.
- Scissors and/or rotary cutter and mat if you have them.
- Sewing machine
- White thread.
Directions:
- Cut out your belt on a fold on vinyl to make sure you have both sides the same. The belt is 3 inches wide, 15 inches long, and pointed in the front. I absolutely LOVED the belt over at P&S Costume Creations! I used her belt as my inspiration for this belt but I actually printed off a pattern for the silver medallions from Craftiness is not Optional because they perfectly fit my belt pattern!
- For my belt you'll also want to cut one piece of vinyl for the back 4 inches long by 3 inches high.
- Cut two pieces of 3 inch elastic each 4 inches long.
- Cut 5 accent shapes out of your silver fabric. Remember I used the shapes from Craftiness is not Optional.

Assemble your belt:
- Glue your shapes to the front of the belt. Avoid the last 1/2 inch on each side.

- Sew the elastic and vinyl together to create a full belt. The ends of the elastic just get stitched to the underside of the vinyl.


- Glue on the buttons. Don't be afraid to mix it up and stack buttons! Initially I used buttons with loop backs that I sewed on but the flat backed buttons work better. I just use an exorbitant amount of hot glue to hold them on. I centered a button or stacked button on each silver piece.

- Have your child step into the belt and pull it on. Then tuck the dress through and pull up a but for flounce.
Have fun making a Princess Leia costume! May the Force be with you! Please let me know if you need any help with the pattern!
xoxo Jenny
Here are some other sites you can visit for inspiration on construction help.
P&S Costume Creations has a beautiful women's size Dress tutorial. You can also check out another women's dress tutorial over at Costumes and Artwork. We learned how to do our Princess Leia hair from this tutorial at Sewing Rabbit.

